NJ WATERSAVERS

![]()
Technical Assistance to Install Rain Barrels
Installing a rain barrel may at first seem overwhelming, but if these steps are followed, the installation should be successful. It is important to elevate a rain barrel to create enough pressure to help move the water out of the barrel. The first step would be to determine which downspout will be used to connect the rain barrel.
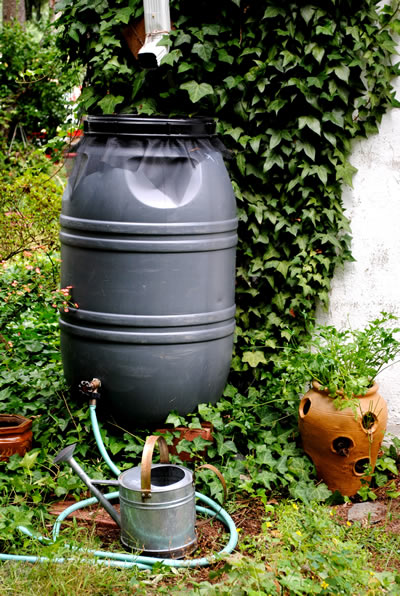
Rain barrel installed, Jennifer Kahn
The downspout may currently direct the roof runoff to an impervious area such as a driveway, sidewalk or street. The downspout may also be directly connected to the local storm sewer system, meaning it goes into the ground and connects to a pipe that leads to a catch basin; either situation would be appropriate to work with. Take into consideration where the overflow will be directed; ideally it should be to a pervious area such as the lawn, flower bed, or garden. If the home or building has a basement, the overflow should be directed six feet away from the structure, but if there is no basement, a three foot hose would be sufficient. Here is a list of items that may be needed to complete this project.
-
Sand or gravel to help level area for rain barrel
-
Bricks, cinder blocks, or pressure treated wood to create a platform for rain barrel
-
Hacksaw or sabresaw to cut downspout
-
Downspout strap
-
Aluminum elbow or a plastic flexible downspout
-
Screws and screw driver to attach new downspout extension
-
Garden hose for overflow
-
Mosquito “dunk” or vegetable oil
-
Long brush to clean rain barrel periodically
The area where the barrel will be installed will need to be on a level surface to prevent the barrel from tipping over. Inform children of the danger associated with the rain barrel if it were to tip over. Water weighs approximately 8.3 pounds per gallon, therefore when full, the 55 gallon rain barrel will weigh approximately 460 pounds.
To create the foundation for the platform, use crushed stone or gravel. Build a sturdy platform using brick, cinder blocks, or wood. To ensure that the platform is safe to use, check it with a level. Now it’s time to figure out where the downspout should be cut. The easiest way to figure this out would be by placing the barrel on top of its platform.
If using an aluminum elbow, place it alongside the downspout in the location where the water will be entering the barrel; draw a pencil mark on the downspout approximately two inches beneath the top of the elbow. Double check measurements before cutting! To protect the siding from being damaged, place cardboard behind the area being cut. To make the cut on the downspout use a hacksaw or sabresaw. Slide the elbow over the end of the downspout, and secure it using screws. To prevent the downspout from moving, a downspout strap can also be used to secure it on the side of the building. In the winter the cut section of the downspout will need to be reattached, so do not dispose of it.
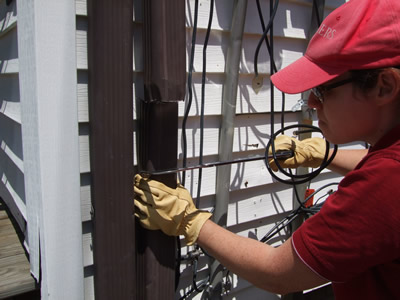
Michele Bakacs cutting downspout
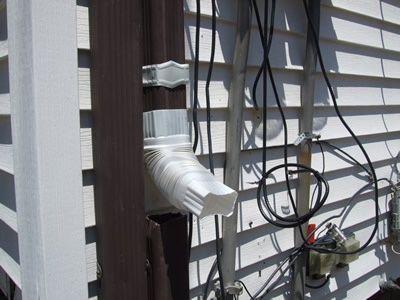
Flexible downspout extension secured with strap
Another option for directing the rainwater into the rain barrel would be to use a plastic flexible downspout. This allows for the barrel to be positioned a few feet away from the house, but screws should still be used to hold the attachment in place.
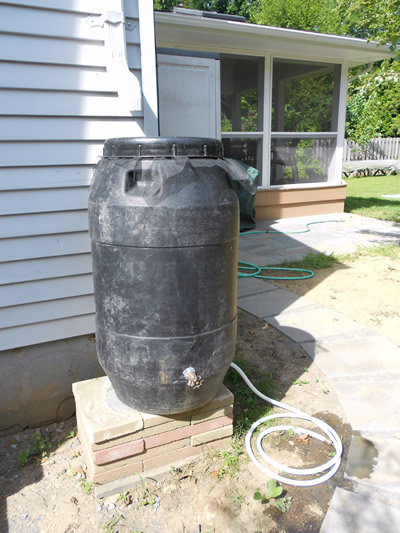
Rain barrel installed, Catherine Gowen
Resources:
Fact Sheet
- Rain Barrels Part II: Installation and Use (PDF, 3 pages)
- http://njaes.rutgers.edu/pubs/publication.asp?pid=FS1118
Special Topics
- How to set up and install a rain barrel
- http://www.rainbarrelguide.com/how-to-install-rain-barrels/
